

Salesforce:
tips and Tricks
How to Install a Package from the AppExchange Marketplace
without a Trailblazer.me Account
Perhaps you’ve run into this problem before?
You’ve found a package you’d like to install in your Salesforce environment from the AppExchange marketplace.
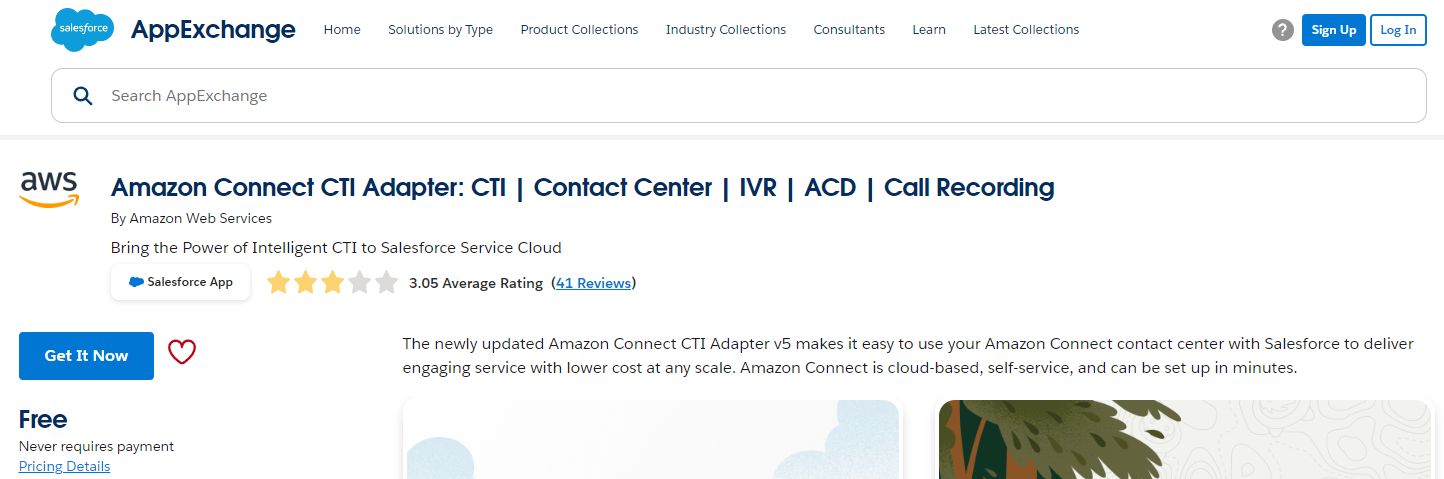
When you click Get It Now, you’re prompted to log in with a Trailblazer.me account. But what if you don’t have an account? Or what if you are installing this package for a client and don’t want it associated with your personal details?

Here we’ll show you how to get around this problem.
If you already have a Salesforce account, click the Log In button on the prompt. Your account does not need to be a Trailblazer.me one, as long as you have Salesforce credentials. You’ll be able to choose Salesforce under “Log in using an existing account” on the next screen.
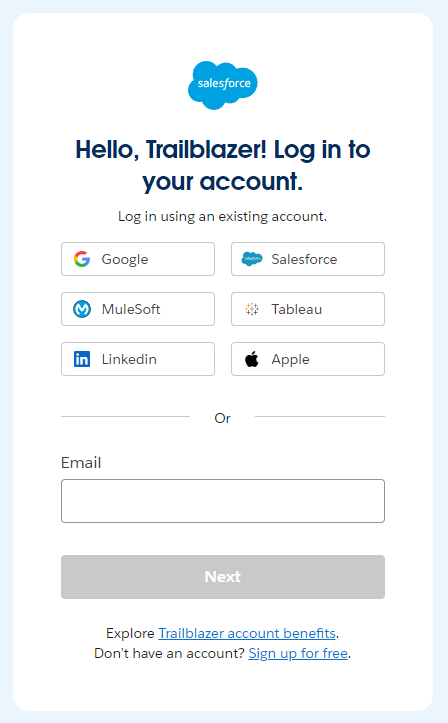
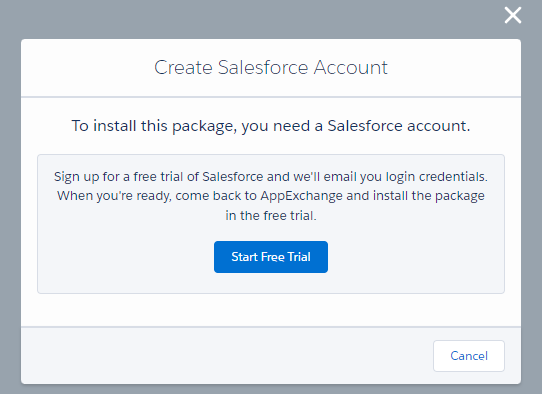
If you do not have Salesforce credentials to log in with, click the Continue as Guest button on the prompt, then Start Free Trial on the next screen, and complete the steps to sign up for a Salesforce Developer Edition.
Once you have your new Salesforce login credentials, begin the process from the AppExchange Marketplace again.
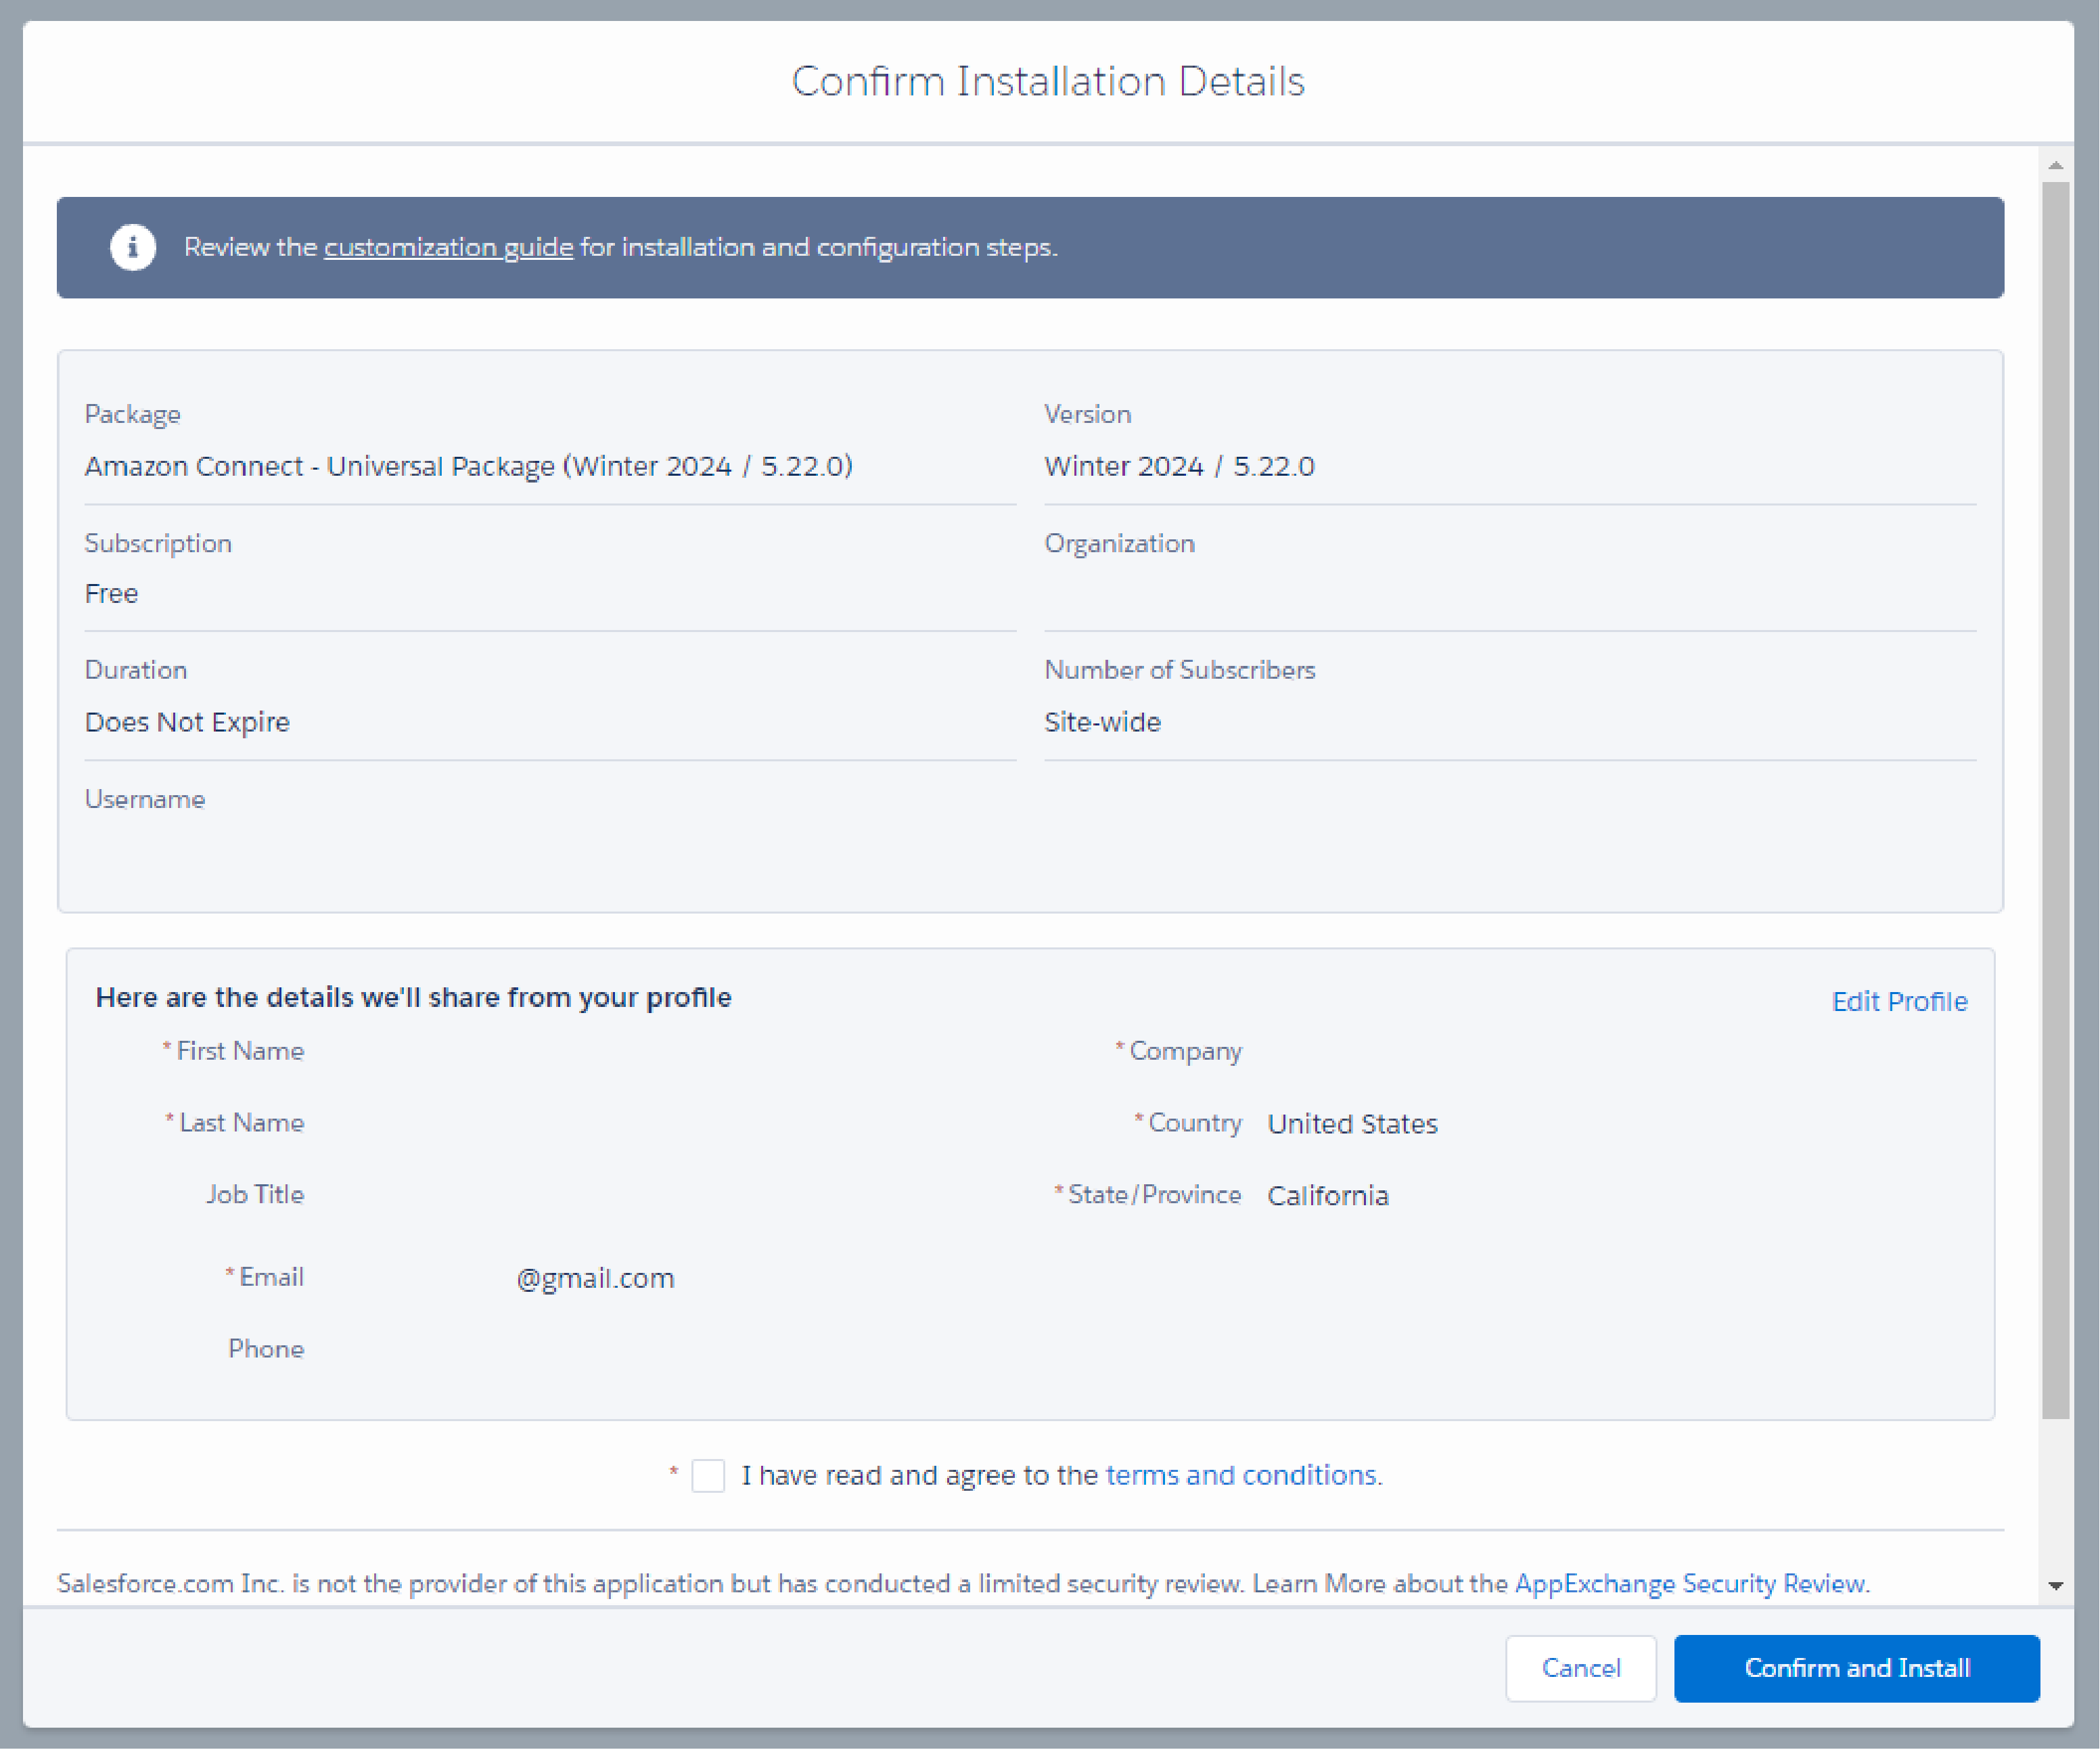
After following the prompt to Log In, you’ll be asked where to install the package. Choose Install in Sandbox.
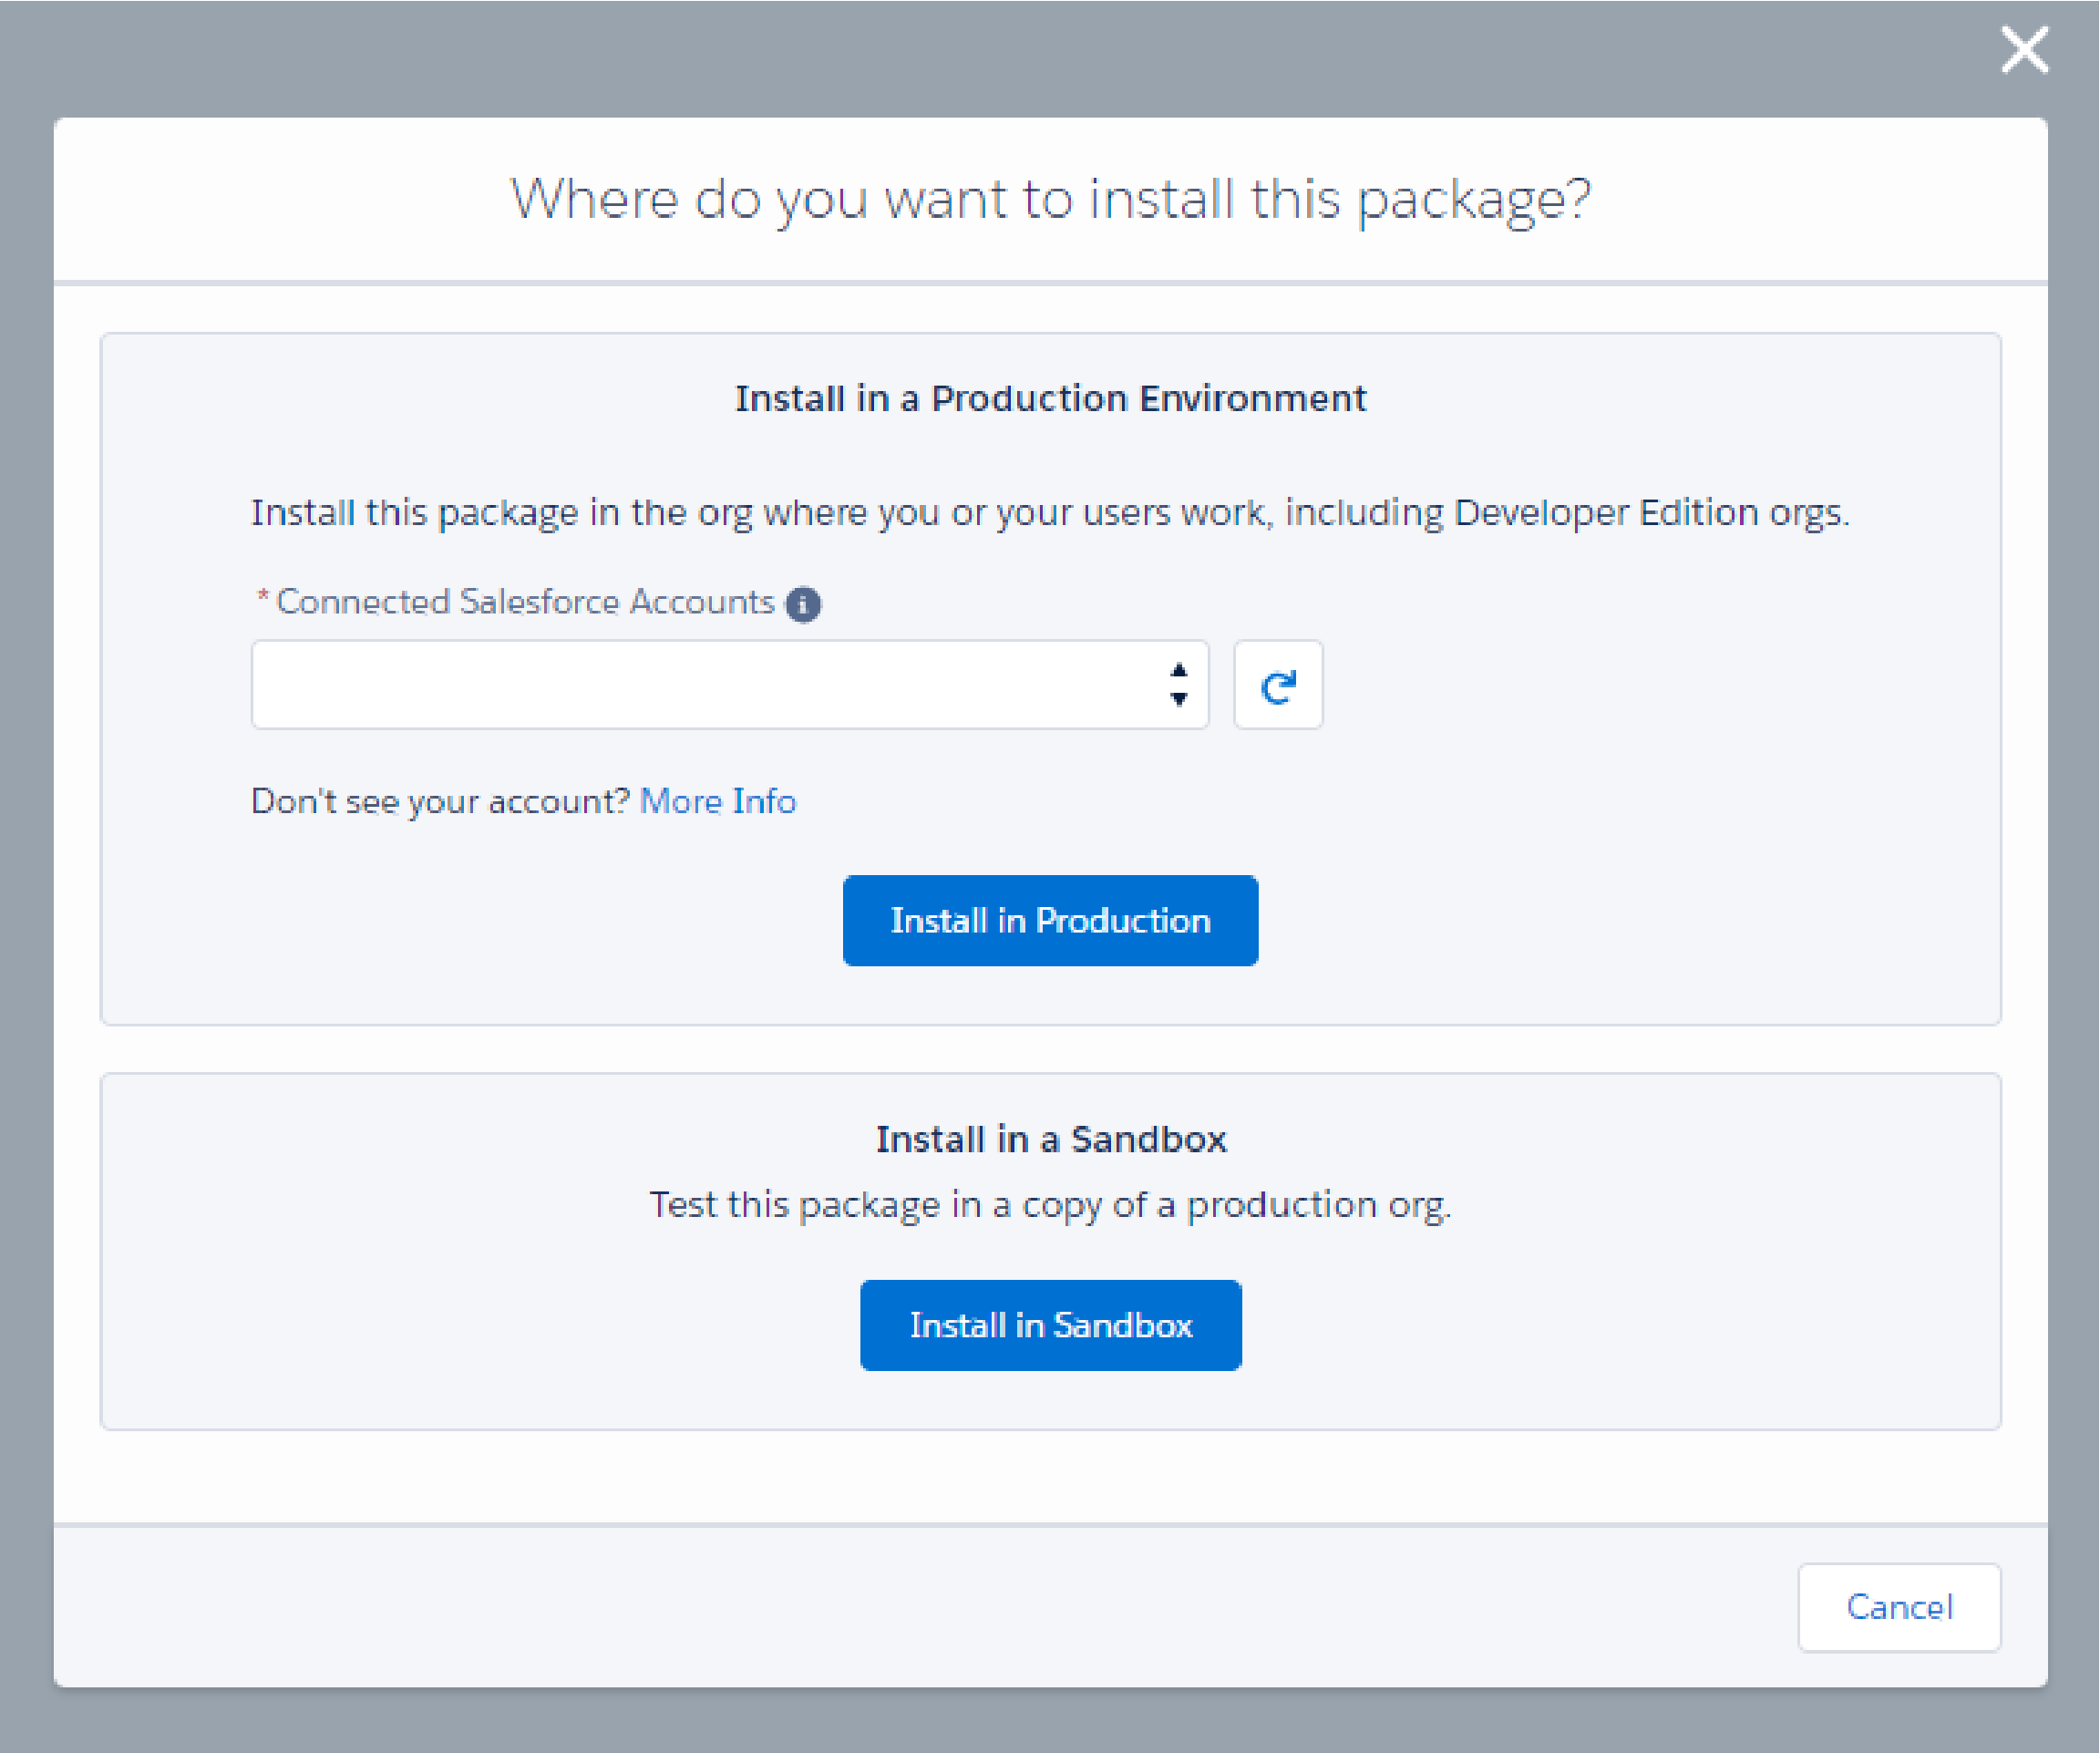
On the confirmation screen, check the terms and conditions box and click Confirm and Install. Do not worry about the profile details shown here, we won’t actually be installing the package with the credentials you have used up to this point.
A message will inform you that you are being redirected to a Salesforce login page.

Once the login page has loaded, look at the URL. You want the package ID number, which begins with “04t”. Highlight from “04t” to the % symbol and copy this number somewhere that is easily accessible for the next steps.

Now open a new browser window or tab and navigate to the Salesforce environment you want to install the package in. Paste “/packaging/installPackage.apexp?p0=PackageID” at the end of the root domain of the URL, replacing “PackageID” with the package ID number you copied.

Hit enter, and you’ll be taken to the package installation page. Now you can install the package in your desired environment without it being connected to your personal Trailblazer.me or Salesforce credentials.

Salesforce Developer Console Query Results to Excel
For Salesforce developers, extracting query results from the Developer Console into Microsoft Excel often proves to be a practical necessity for sharing or analyzing impromptu data.
While Salesforce offers robust reporting functionalities, utilizing the Developer Console for quick on-the-fly queries is preferred by many developers due to its agility.
However, transferring these results into Excel from the console can be somewhat challenging. While Salesforce provides reports for data visualization, developers often find the on-the-fly flexibility of the Developer Console more convenient.
However, copying and pasting directly from the console can result in formatting issues or unwanted data inclusion, making the process cumbersome.
To alleviate this, we’ve discovered a method using Google Chrome’s Inspector tool to simplify the extraction process.
Let’s dive into the primer on how to leverage Chrome’s Inspector tool to obtain HTML table results:
Access the Inspector Tool: Using Google Chrome, navigate to the webpage displaying the required table data. Right-click on the table of interest and select “Inspect” from the context menu. This opens Chrome’s Inspector tool, displaying the HTML elements of the table.
Identify the Table Element: Within the Inspector tool, locate the HTML table containing the data. This view shows the HTML structure, with each element delineated. Right-click at the starting point of the table’s tag, ensuring it’s selected accurately.
Copy the Entire Element: Once the tag is selected, right-click on it and choose “Copy” > “Copy Element.” This action copies the entire HTML table structure, preserving the data integrity.
Paste into Excel: Paste the copied content directly into an Excel spreadsheet. Excel interprets the copied HTML table structure, pasting the data exactly as it appears, maintaining its original format. This method ensures a more precise transfer of data from HTML tables into Excel compared to traditional copy-paste methods, especially when dealing with complex table structures.
reset your dns cache
The Domain Name System (DNS) serves as the backbone of how computers locate and connect to resources on the internet.
Often, DNS configurations are automatically set up by service providers like Verizon or cable companies. Using default DNS settings may sometimes lead to connectivity issues or sluggish performance.
A quick and effective way to potentially address these issues is by ensuring your DNS settings are optimized. When using automatic DNS configurations, there’s a possibility that the stored entries could become corrupted, affecting the browsing experience.
Here’s a simple step-by-step guide to optimize DNS settings:
Access Command Prompt: Navigate to your computer’s start menu and type “CMD” to open the Command Prompt. Please note that administrative permissions might be required to execute these commands effectively.
Flush DNS Cache: Once in the Command Prompt, enter the command “ipconfig /flushdns” and hit Enter. Executing this command will refresh and reset the DNS cache, eliminating any potentially corrupted or outdated entries. Clearing the DNS resolver cache essentially means removing stored information related to previously visited websites or resources. By doing so, your computer will re-query and obtain updated DNS information when accessing websites or online services, potentially resolving connectivity issues and enhancing overall performance.
It’s important to note that while flushing the DNS resolver cache can be beneficial in some cases, it might not entirely resolve all internet-related issues. Other factors, such as network configurations, hardware limitations, or broader internet service provider issues, could also contribute to connectivity problems.
Optimizing DNS settings through the process of flushing the DNS resolver cache is a simple yet effective method to potentially enhance internet connectivity and browsing performance. By regularly performing this action, users may experience smoother and faster access to online resources, contributing to a more seamless internet browsing experience.
Change your dns server manually
For Salesforce developers, extracting query results from the Developer Console into Microsoft Excel often proves to be a practical necessity for sharing or analyzing impromptu data.
While Salesforce offers robust reporting functionalities, utilizing the Developer Console for quick on-the-fly queries is preferred by many developers due to its agility.
However, transferring these results into Excel from the console can be somewhat challenging.
While Salesforce provides reports for data visualization, developers often find the on-the-fly flexibility of the Developer Console more convenient.
However, copying and pasting directly from the console can result in formatting issues or unwanted data inclusion, making the process cumbersome.
To alleviate this, we’ve discovered a method using Google Chrome’s Inspector tool to simplify the extraction process.
Let’s dive into the primer on how to leverage Chrome’s Inspector tool to obtain HTML table results:
Access the Inspector Tool: Using Google Chrome, navigate to the webpage displaying the required table data. Right-click on the table of interest and select “Inspect” from the context menu. This opens Chrome’s Inspector tool, displaying the HTML elements of the table.
Identify the Table Element: Within the Inspector tool, locate the HTML table containing the data. This view shows the HTML structure, with each element delineated. Right-click at the starting point of the table’s tag, ensuring it’s selected accurately.
Copy the Entire Element: Once the tag is selected, right-click on
it and choose “Copy” > “Copy Element.” This action copies the entire HTML table structure, preserving the data integrity.
Paste into Excel: Paste the copied content directly into an Excel spreadsheet. Excel interprets the copied HTML table structure, pasting the data exactly as it appears, maintaining its original format.
This method ensures a more precise transfer of data from HTML tables into Excel compared to traditional copy-paste methods, especially when dealing with complex table structures.
Google Public DNS
IPv4: 8.8.8.8 and 8.8.4.4
Enter DNS Server Addresses: In the manual settings for your network connection, enter the preferred DNS server address (e.g., 8.8.8.8) and an alternate DNS server address (e.g., 8.8.4.4) obtained from your chosen public DNS provider, such as Google DNS.
Save Settings: Once you’ve entered the DNS server addresses, save the settings. After making these changes, the next time you reboot your computer or reconnect to the network, your DNS server configuration will be set up automatically with the specified addresses.
It’s always a good idea to periodically verify reliability and suitability for your specific needs. Your location and internet service provider might affect the performance of these DNS servers, so you might want to test a few to see which one works best for you.